What to Put in a Medical Binder (So Doctor Appointments Feel Less Rushed)
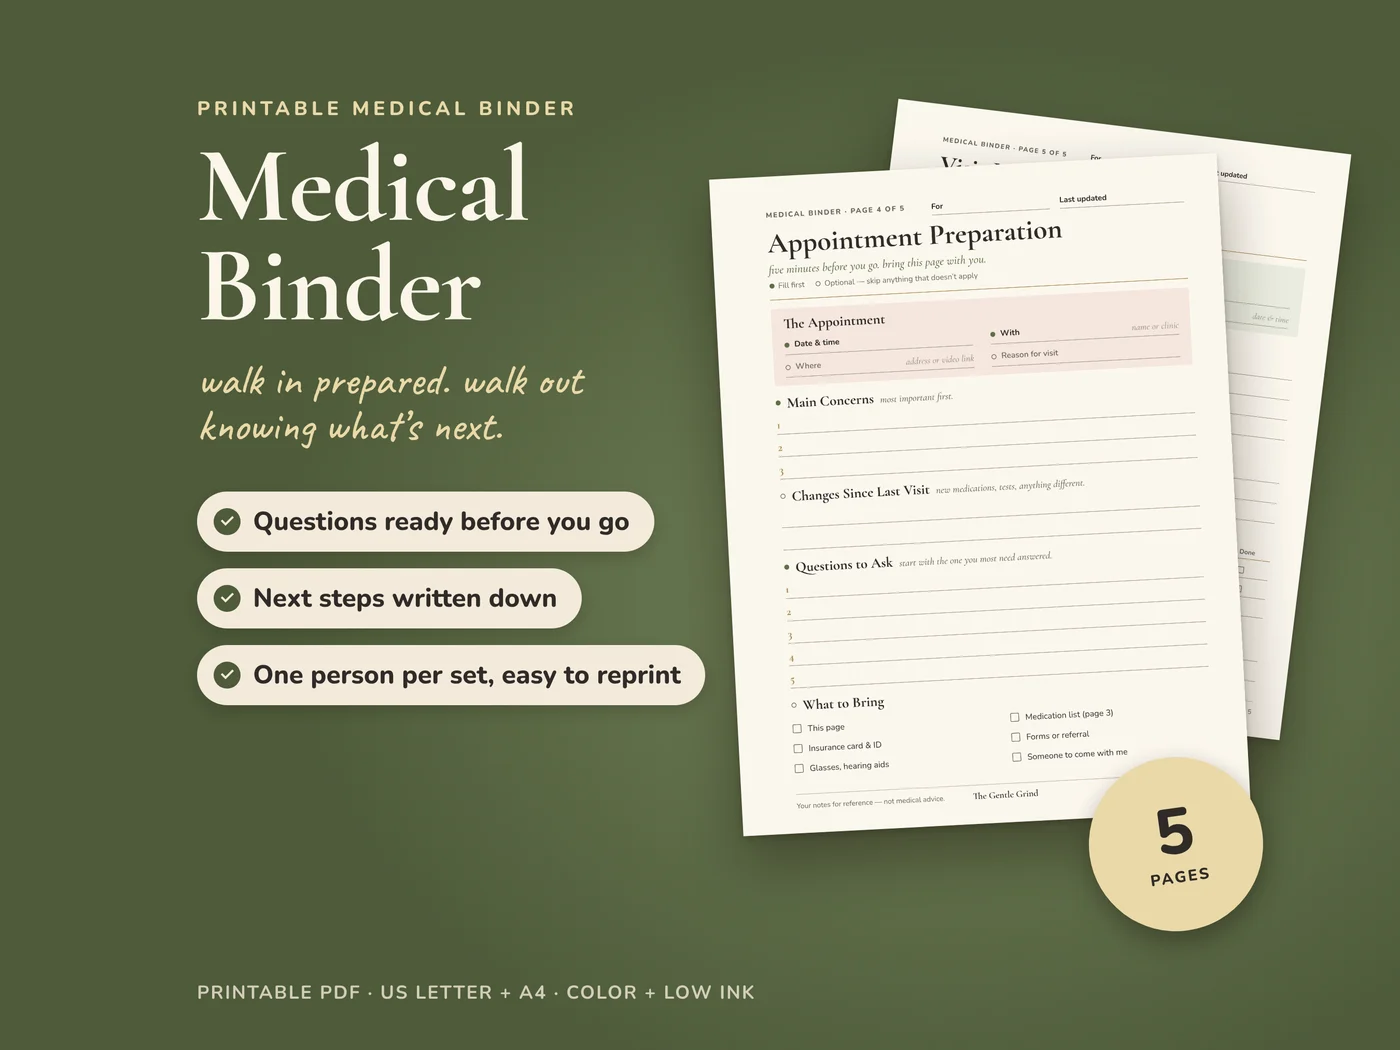

Short answer: a medical binder holds what you need at appointments: your basics (allergies, conditions to mention, where your insurance card is), your providers and pharmacy, a current medication list, a page to prepare your questions before a visit, and a page for notes and next steps after it. Five pages cover it, and the prep page takes about 5 minutes.
Most people know the feeling. You wait weeks for an appointment, the visit goes fast, your mind goes blank when the doctor walks in, and by the time you’re in the car you can’t quite remember what they said about the follow-up. A simple binder doesn’t fix a rushed appointment, but it means you walk in with your questions written down and walk out with the next steps on paper.
What goes in a medical binder?
Think about what you get asked at every appointment, and what you wish you’d remembered afterward. These five pages answer most of it.
1. Your basics
Allergies and how you react to them (write “none known” if you have none), conditions worth mentioning, any devices you use (glasses, hearing aids, a CPAP), and where your insurance card is kept. Write where the card is, not the member number.
2. Your providers and pharmacy
Every doctor, specialist and clinic you see, with their specialty, phone number and patient portal, plus your pharmacy and how you order refills. Put your primary care doctor first. When a new specialist asks who else you see, the answer is on one page.
3. A current medication list
For each medication, vitamin or supplement: the name, the dose, when and how you take it, what it’s for (if you know), who prescribed it, and the date you last reviewed the list. Bring it to every appointment. Write it yourself and keep it current, and check with your pharmacist before changing anything.
4. Appointment prep
This is the page that makes the biggest difference. Before each visit, jot down:
- Main concerns, most important first
- What’s changed since your last visit (new medications, tests, anything different)
- Questions to ask, starting with the one you most need answered
- What to bring: this page, your medication list, insurance card and ID, any forms or referrals
5. Visit notes and next steps
Before you leave, or right after, write down what you talked about, the instructions you were given (in the words used, if you can), and the next steps with dates: tests, referrals, follow-up appointments. Add anything you still want to ask through the portal or at the next visit.
How do you use it at an appointment?
| When | What to do | Page |
|---|---|---|
| The day before | Update your medication list if anything changed | Medications |
| 5 minutes before | Write your top concerns and questions | Appointment prep |
| In the room | Start with your most important question | Appointment prep |
| Before you leave | Write instructions and next steps with dates | Visit notes |
| At home | Add follow-ups to your calendar | Visit notes |
If it’s hard to take notes while you listen, it’s fine to ask the doctor to slow down or repeat something, or to bring someone along to write for you.
Should you keep one binder per person?
Yes, if you can. One set of pages per person keeps things from getting mixed up, especially if you help a parent or child with their appointments too. Put the person’s name and a “last updated” date at the top of every page, and reprint a page when it fills up rather than squeezing in more.
What a medical binder is not
It’s your own notes. It isn’t medical advice, it doesn’t replace your medical records, and it doesn’t replace anything your doctor or pharmacist tells you. Its job is simpler: help you remember what you wanted to ask and what happens next.
A medical binder you can print tonight
You can do all of this on plain paper. If you’d like it laid out for you, the Medical Binder printable has 5 pages: Medical Essentials, Providers & Pharmacy, Current Medications, Appointment Preparation and Visit Notes & Next Steps. Every page has a “For” line and a “Last updated” line, filled dots mark what to fill first, and it comes in US Letter and A4, in color and low ink, with a wide margin for hole punching.
Want the bigger picture too? Our guide to what to put in a just-in-case binder covers who to call, where your documents are and how the house runs, and the Just-in-Case Binder printable includes a version of the Medical Essentials page. If your head feels too full to start, a quick brain dump can help you get your questions out first.
Medical binder FAQ
What should go in a medical binder?
Five things cover most of it: your basics (allergies, conditions to mention, where your insurance card is), your providers and pharmacy, a current medication list, a page to prepare for each appointment, and a page for visit notes and next steps.
How do I prepare for a doctor’s appointment?
A few minutes before you go, write down your main concerns (most important first), anything that’s changed since your last visit, and the questions you most need answered. Bring your medication list and insurance card, and ask someone to come with you if that helps.
What should I write down during or after a doctor’s visit?
What you talked about, any instructions in the words the doctor used, the next steps with dates (tests, referrals, follow-ups), and anything you still want to ask. Writing it down before you leave, or right after, makes it much easier to remember.
Should I keep one medical binder for the whole family?
It’s usually easier to keep one set of pages per person. Put the person’s name and a ‘last updated’ date at the top of each page, so pages don’t get mixed up and anyone helping can see how current they are.
Is a medical binder the same as my medical records?
No. A medical binder is your own notes to help you at appointments. It doesn’t replace your medical records, your doctor’s instructions or your pharmacist’s advice. Check with your doctor or pharmacist before changing any medication.
Try this before your next appointment: on one sheet of paper, write the one question you most need answered, and put it at the top.